Showing posts with label Corian. Show all posts

Sunday, May 15, 2016

On Finishing...

If you are looking for great tips and advice on applying finishes,this isn't it. Please try "Flexner on finishing" or other great resources.

There are many types of blogs & sources of woodworking information these days, from people who resurface centuries old resources, those that build things out of pallets, those that are entertaining, those that provide step-by-step instruction and even some places that seem to just add some token content to prop up their advertising. Many provide weekly or even daily updates on what they are working on probably in part to remain "relevant" or make some income stream. I don't begrudge or think they are doing it wrong, most are surely more successful by any measurable standard, but this blog isn't that type. 


I've had intentions of keeping up to-to-date here, posting in-process blogs, and I probably will from time to time, but I'm a bit more reserved than that. Even though I know that not many folks are reading, I've found that often I don't really know how/when projects will end up or which direction they will go and it scares me to show that live in front of the world. 


I've also found that I blog as a retrospective of what I've accomplished for looking back at times when it feels like I am not accomplishing much. But probably the biggest reason is that I've found that I like it a lot when my posts are a story and have some larger connected thought. This usually means they must be at a time when I can reflect on the project, which is usually at the end, when I'm finished. 

Finally getting to some workbench leg mortises

This is a problem because I haven't finished much in a long time. My last real project was my split top Roubo workbench, which aggravated a shoulder injury and I had to pull off that project to recover. (I have recently gotten back on that wagon and am making some progress.) I have a bit of a psychological problem with unresolved projects, so that also for the most part doesn't let me go on to another project until I have finished the previous. If I do, I have something nagging me deep within telling me to go back and finish. I want to make some chairs in June, so I need to finish this up first.

  
You're sure it's not load bearing right?...
The largest obstacle has definitely been the "Epic Kitchen Project." I haven't mentioned it here, but if you follow me on Instagram (or look in the IG sidebar here#EpicKitchenProject), you'll know it's been underway for quite some time... While we call it a kitchen project, in reality, about 50% of my house sqft is being reconfigured. It's in a couple phases, and while I've completed the primary portion, combining the old kitchen, dining and living rooms (with only a few small cosmetic things to finish), I haven't yet started on the new dining/laundry/media room that will be reconfigured from the previous family room.

More recently, I took up another hobby that requires some time. Back in November, I started running because I needed the exercise and figured that couldn't aggravate my shoulder problem further. (I promise that I won't be turning this into a fitness blog...ever.) I fell into a small competitive group of my friends that vie for "most miles" bragging rights each month. Even though I'd never run a race, the peer pressure encouraged me to run the half marathon held in Champaign each year. As I began the training, I figured I'd start the marathon training and then back down when I couldn't hack it. By the time that reckoning came, I was too committed and decided to "just do it".

As race day approached, the weather forecast was horrible. Rainy, windy and cold (high 40°'s) presented conditions I hadn't trained for. There was a very high probability that the race could be cancelled. This stressed me immensely. While I had never had a bucket-list goal of running a marathon, I had done too much training build-up to just cast it aside. I'm not a guy that "runs marathons," so I also struggled with putting it off weeks/months and continuing at that level of training to finish a different marathon. I got some incredible hi-tech drymax socks, and became determined to run no matter what. Now I understand why people do dumb things like run marathons or climb mountains in bad conditions, and die; the training invested distorts good judgement into bad. In the end, the thunderstorms held off and while it rained steady all day and was only ~50°, I was able to run. I was wet. I was cold. It was challenging to run the distance; but I finished. I'd even met my goal of under 4 hours (3:59:51 whew). 

It wasn't everything I'd hoped for, but I had finished with something I was proud of. It made me think about so many of life's projects, blogging, woodworking or otherwise, we prepare, but are presented with obstacles and challenges along the way. When we keep at it, we can be happy with what we actually can accomplish.


We are out of Popcorn!

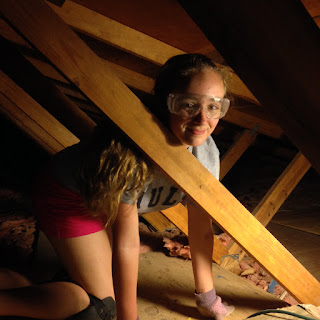
Breakfast in bed, or the attic.


After the desolation

Building Walls & Skills


Jenga!

Paint brings it together

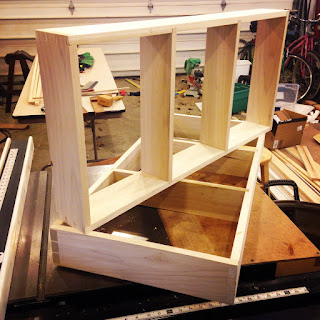
Kitchen boxes, in boxes

Reminds me of some sort of Mondrian art


Laxarby only comes in Black in the US, time to learn about white lacquer


Traditional molding techniques, cheaper than "colonial" and much better looking


Customizing the bar cabinet doors


Friday, November 28, 2014

Woodworking in the Stone Age

This is the follow up I had promised on the making and usage of the plane design I spoke of in the previous post. (better late than never)

Bottom line: I count this a successful design, experiment & tool, but don't think I'll be making/using solid surface material again for a plane. I just don't enjoy the process. I'd like to make the same body in wood sometime though.

If a potential planemaker was already tooled up for working the stuff with a CNC router per the cabinet shop norm, they could come up with some straightforward paths and offer a nice line of smoothers with their scraps, with a pretty minimal investment of effort. The material is very dense, and feels nice.

I'm not planning on detailing the process, but have included photos of steps along the way. If you have a specific question, just leave a comment. Most everything was done using 4 tools table saw, pattern cutting router bit, stationary belt sander, and drill mounted drum sander.

Prior to this build, I made a prototype in a block of Cyprus. I really like the two halves method of plane making. I think this has a lot of potential.

Lessons Learned:

  • Geometric Design. I'm really pleased with how it turned out. All-in-all it handles well (perhaps a bit toe heavy) and looks good to me. 
  • Cross pin. I sort of trivialized that I could make this fit around the other parameters like wall profile and mouth opening later on. This was a mistake, and meant that in the end I had to place it a little closer to the iron than desired, making the wedge thinner than I would have preferred. 
  • Wedge Shape, I sort of thought this would be simple to design on the fly as well. It wasn't. getting the shape that fit the body and could still be tapped in the directions needed etc.
  • Planing angle. I bedded this plane ~55° It makes it a bit harder to push, but cuts well in anything I've thrown it's way (in most any direction)

Challenges:

Materials

This project was 80% about the materials, so it's no surprise that this is where I have the most to say.
  1. I didn't have true Corian® but some knock-off solid surface product (my source was leftovers from an auction). The main differences being that it has tiny bubbles (not as good as the Don Ho version) that come through when you work into it. I also suspect that Corian® is more uniform in thickness.
  2. The stuff I had, wasn't parallel and/or flat, which didn't become apparent until I went to glue up, this left a line. If I had used matching epoxy it would've blended nicely.
  3. "Corian" machines very nicely with carbide tools, like routing MDF I suppose. That said, I had quite a bit of chipout in the mouth area from the table saw, this was filled with epoxy, so no impact on function, but again visible.
  4. While not cold as steel, it's not quite as warm as wood. This might again be an issue with the non-genuine Corian®
  5. Its got a really nice heft to it.
  6. Routing Template
  7. Corian is messy...like 5 8yr old boys at a sleepover messy.
  8. Even though I know it's less dulling than my cast iron baileys, I feel apprehension installing/removing the iron. Feels like working without a net over concrete.

Maintaining symmetry 

Since only the bed and sole are flat in the end, careful layout and operation sequencing was important to make sure that the needed work could be done to keep things symmetric.


Thursday, October 23, 2014

What's Going on in there?


A while back (actually records indicate 5/30/14) I received a tapered iron by way of a giveaway from "Nice Planes" (which regrettably has since has joined the list of "no longer in production" planemakers) I want to share with you the process of how I often design projects. If you don't like to see how sausage is made, feel free to move along, in the next couple days I'll have a post sharing the build of this project (and after action report for Brian).

Like most projects, I start out shoehorning something new into the massive list of items I desire to make, usually under the premise of "It'll only take a couple days." Also per the norm, I rarely have clarity and just jump in, even though at some point that happens after my design process reaches full fermentation. I really enjoy the design process and since it always overlaps working or finishing another project, there isn't any time when I'm twiddling my thumbs.


My first thoughts were that in the spirit of the kit received, I should knock out a Krenov style laminated plane and put it to use. The only real problem being that I didn't NEED another bench plane (want?...always) Another problem is of course that I don't generally do simple and that's when my mind starts to wander and dream of possibilities. I want to show my random thoughts along the way, many will be left, never to be explored, while others may morphs into other projects. Some of the planes "not made" could have been better than what I ended up with, and who knows maybe someday I'll get the opportunity to explore them. If anyone desires to take one of these further, please do; and let me know, I'd like to see how they turned out. (or of course commission one)

*Warning: there are some images I have lifted from the web that are not mine, hopefully they are obvious, and I am not claiming them as my own work, but want to illustrate my design process

Layered lamination pattern?

  • Started out with Nice® iron (3-1/2 long, 1-1/2 wide, 1/4 thick)
  • Decided laminated plane ideal
  • Thought about stacked layered plane with scroll work filigree or Marrakesh patterns
    • Each layer could be CNC cut and stacked 
    • Great Wave or comfy rear tote?
    • (use dowel pins for ease of alignment)
  • Curved wave rear tote came to mind, followed by Hokusai "Great Wave" print (one of my favorite works of all time)
    • See that someone in Dresden has similar idea on a larger scale...
    • This could look good with dyed maple laminations
    • What wood can I easily get that is white enough, Maple? Holly?
    • In Dresden
      • Corian! It's Heavy, stable, colorful, machinable, warm to the touch too
      • Thought about thin layering blues & white corian for 3D print wave plane
    • Wedge for plane would be wood and In shape of boat from print
  • Think to self: Self, it will be a lot of work to make CAD models for this plane and tool paths for many layers.
  • Found local makerspace
  • Stumbled across white corian without looking, should look for blue
  • Consider epoxy inlay for wave design
  • Considered what some ivory white planes might look like
  • Considered scrimshaw And inked carvings
  • Boxwood not ivory, but white with "ink"
  • Remember my visit to the Sindelar Tool Museum and his ivory plow planes and "scroll" planes
  • the Beautiful K4
    Krenov Plane
  • Reference other inspirational design touchstone planes, Krenov, S&S K4, DaedTool Index planes, SMT loopyMacpherson's Art Deco etc. I admire
  • Some more sketching including Braun and porcelain paths
  • Think about porcelain & China delicate rolled edges
  • Eve from wall-e inspired by Apple and "the future"
  • Given solid white material, think "Apple" Or Eve from Wall-e
  • Research Johnny Ives, Dieter Rams, Bauhaus, Braun
    • The clean, modern, textured Braun SK2
    • See Braun SK2 Radio think about texture and minimalist future shape
    • Interesting the statement a "modern" plane makes given it's ancient nature
    • Ovalia chair (it seemed cooler in my head)
    • Look at the Ovalia chair
  • Nail down some realistic sizes for this plane
    • 2-2-1/4 wide For 1-1/2 iron
    • ~7" long
    • higher angle ~55°
    • No more than 2-1/2 tall to adjust iron
  • Saw documentary "Dear Mr Waterson" think about simple shape and inlaying a daily Calvin & Hobbes strip on the side
  • My "final" sketch
    • Decide I need to flip through  my compilation and find an appropriate one
    • Can't decide if it is aspirational for Watterson's  Incredible art or derivative and not what the artist would want…
  • More sketching "inside the box" determined by plane size leads me ultimately to this. I decide that I can probably knock it out in a couple of days (and stall on the shop redux), and if it doesn't turn out, then it'll make an interesting paperweight and I still have the components for a Krenov plane to pursue some other direction. Hopefully in the finished  piece you can see some of my influences and thinking.
    End result, laying in some walnut test shavings
    Woodworking in the Stone Age ... or ... Introducing the iPlane 7